OpenVPN is provided for SysAdmins, security engineers and network engineers to reach private networks. Staff trying to reach internal UCAR networks should connect with GlobalProtect VPN.
OpenVPN servers are provided to:
- Provide secure access to organizational systems.
- Reduce the number of network connections run.
- Reduce the number of common machines running the same service.
- Reduce the amount of back-end port configurations NETS needs to do.
Please select your operating system below for instructions on using OpenVPN.

Linux
Once installed, download the individual server profiles: You should see: 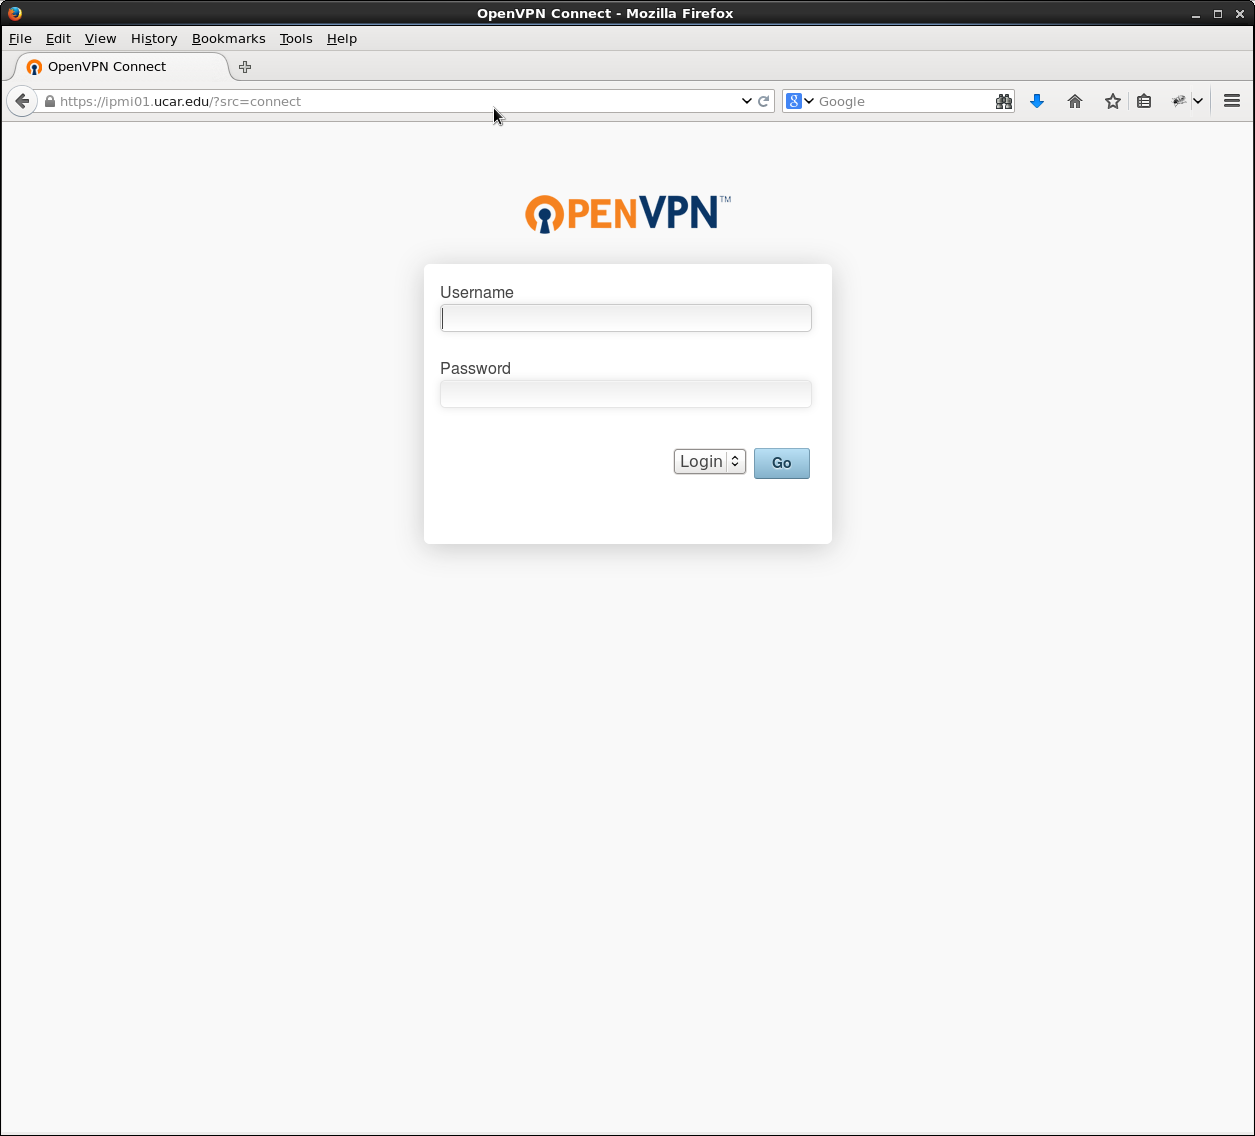
|
Log in using your UCAR username and two-factor authentication method. |
You'll be presented a screen where you can download the OpenVPN client, or a configuration file. Download the configuration file named: 'Yourself (user-locked profile)'. 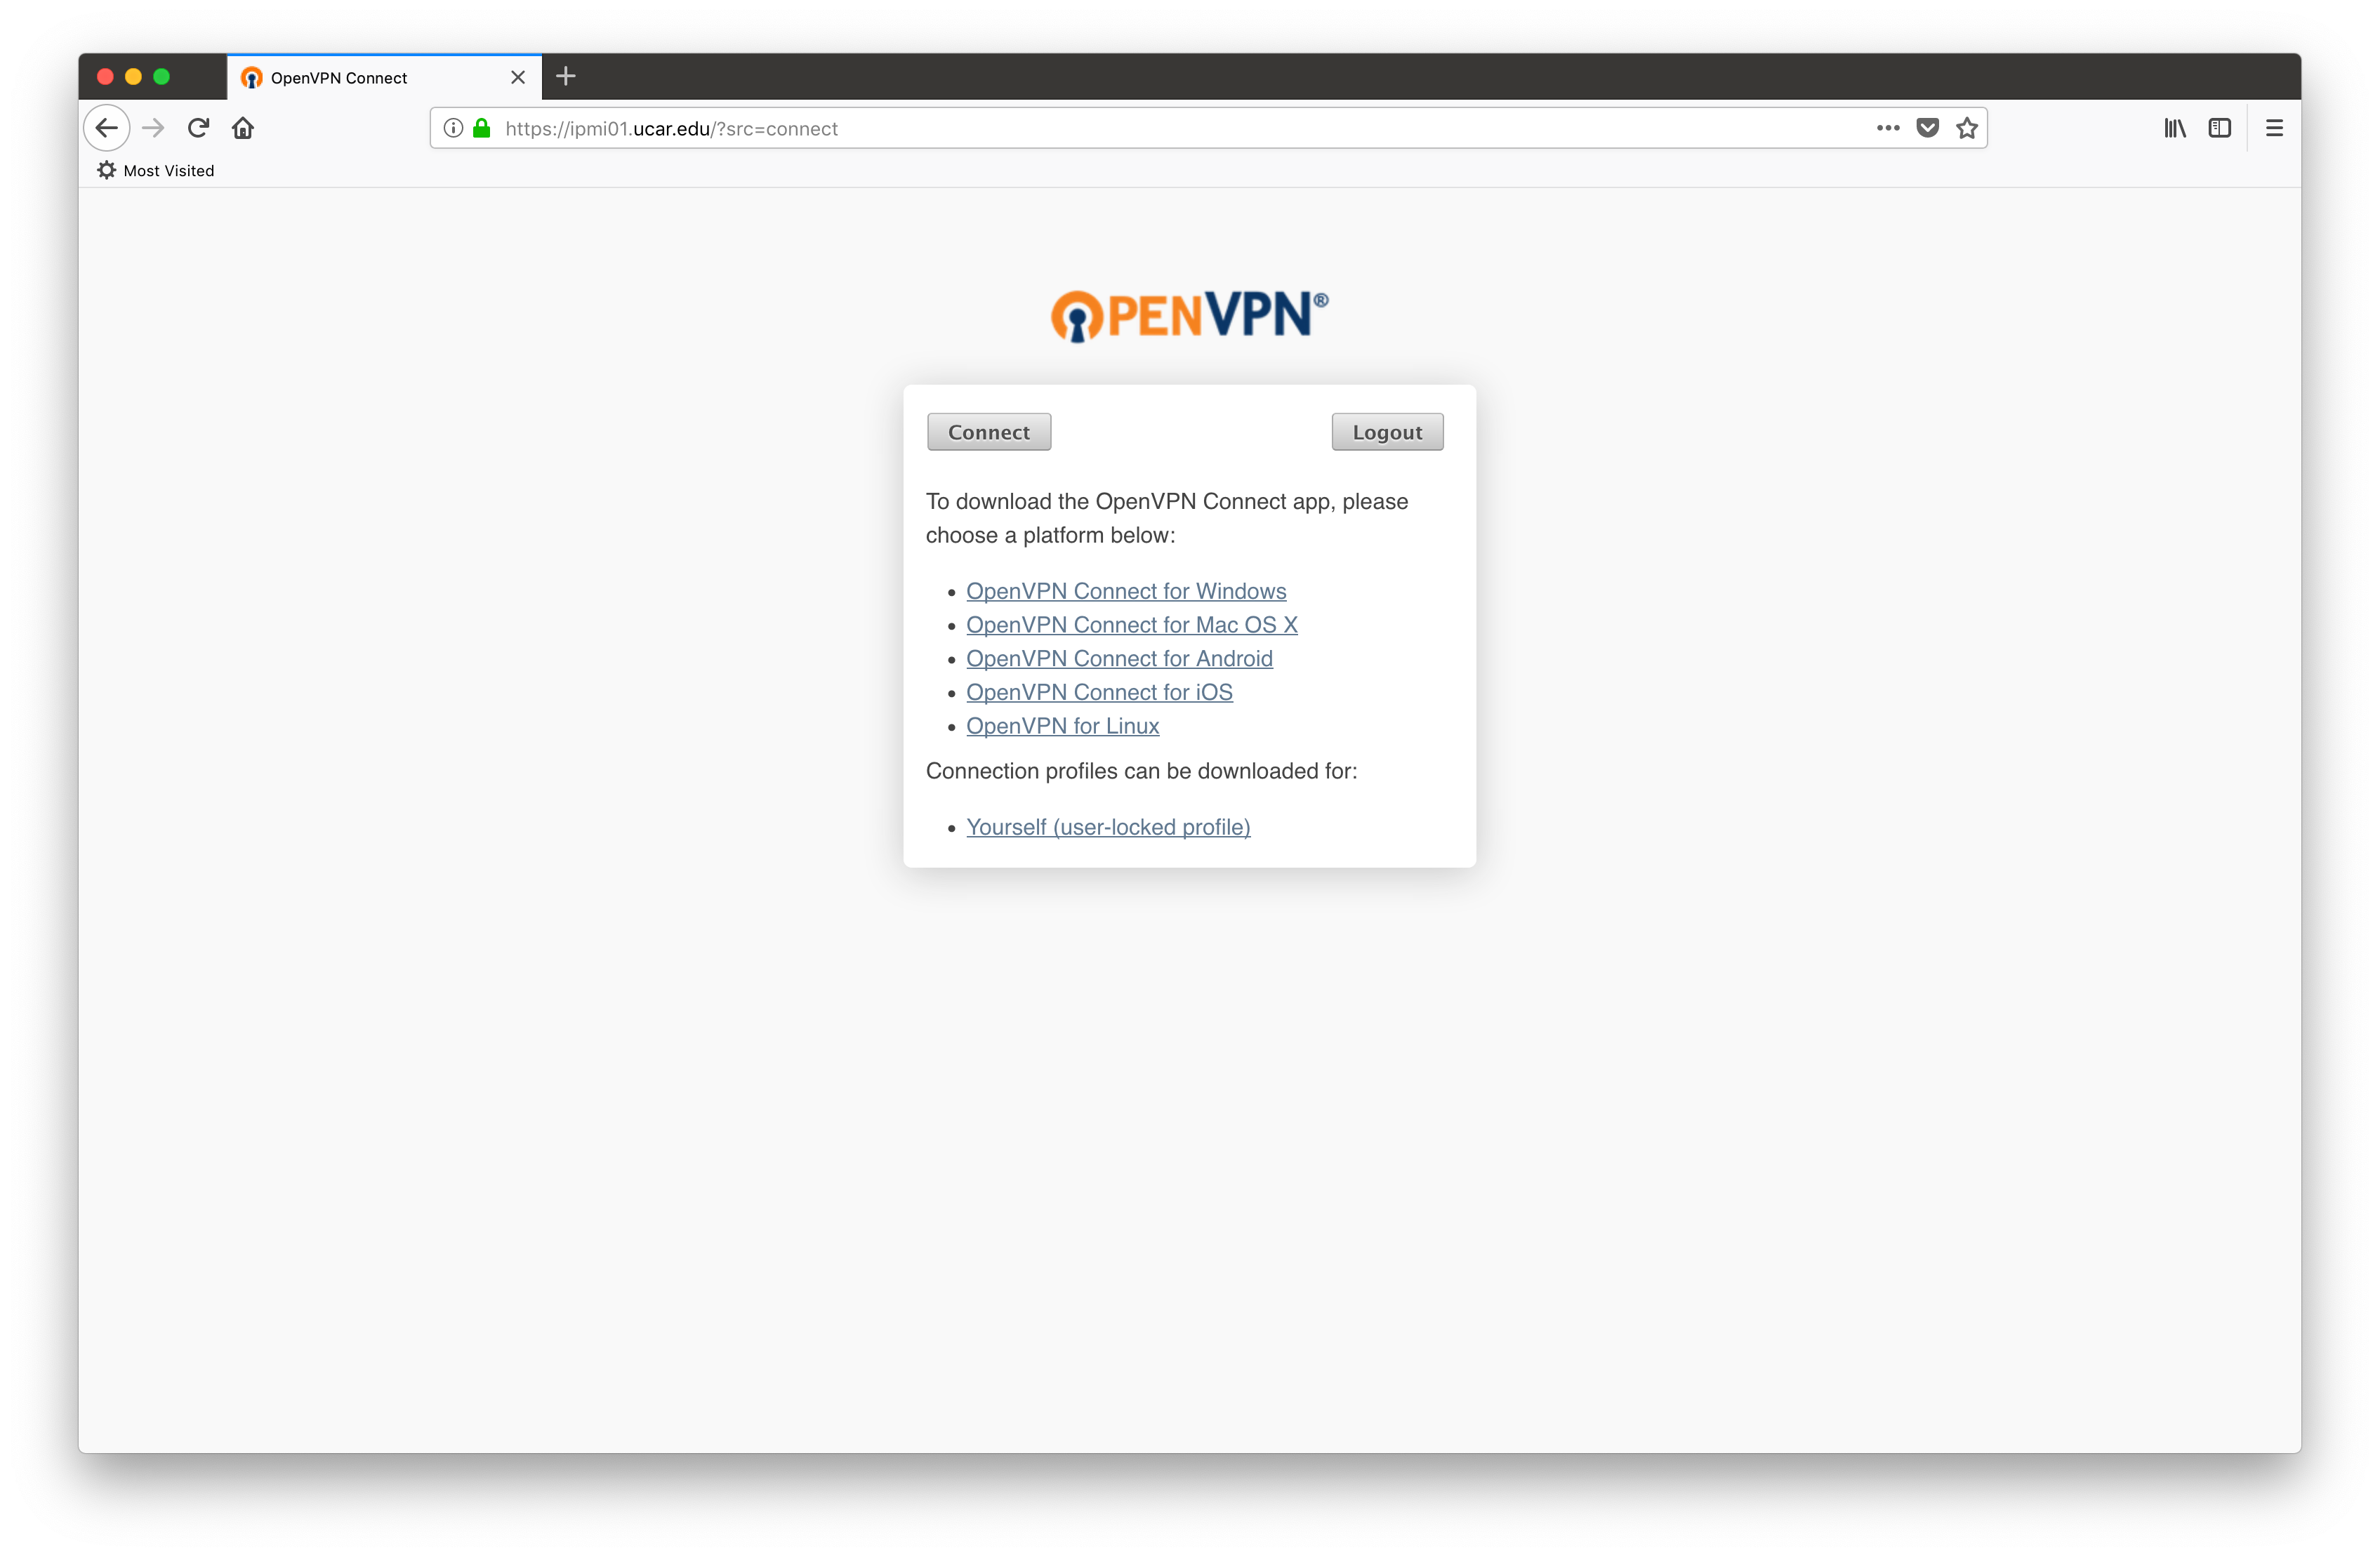
|
Rename the saved file to match the name of the server you downloaded it from to identify which server you are connecting to in the future. (i.e. If you downloaded from ipmi03.nwsc.ucar.edu, rename the downloaded file from "client.ovpn" to "ipmi03.ovpn".) |
Run the OpenVPN software and point to the profile. (sudo openvpn --config ipmi01.ovpn) |
You will then be asked for your password to use sudo and then you will need to authenticate via your username and two-factor authentication to the OpenVPN system. It will take a few seconds to establish a connection, but once established you should be able to reach your IPMI, iDrac or private networks and devices. |
|
Macintosh
Log in using your UCAR username and two-factor authentication method. |
You'll be presented a screen where you can download the OpenVPN client, or a configuration file. Download the configuration file named: 'Yourself (user-locked profile)'. 
|
Rename the saved file to match the name of the server you downloaded it from to identify which server you are connecting to in the future. (i.e. If you downloaded from ipmi03.nwsc.ucar.edu, rename the downloaded file from "client.ovpn" to "ipmi03.ovpn".) |
Download the client program called TunnelBlick (stable version). |
Install the software by unpacking the dmg image and install the package software. |
Run the app called 'Tunnelblick'. You will see the notification: “Tunnelblick” is an app downloaded from the Internet. Are you sure you want to open it? 
Click Open, then authenticate the installation. |
Then you will see the notification: Welcome to Tunnelblick 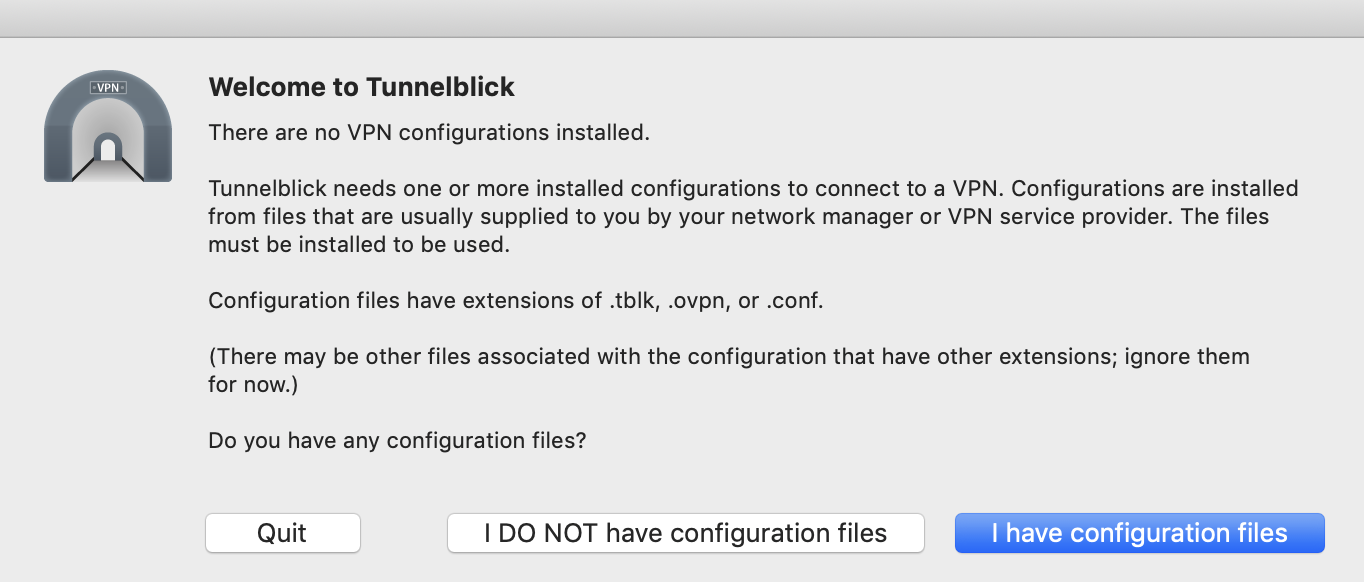
Click 'I have configuration files', then click 'OK'. |
Click on the Tunnelblick icon in the Finder bar, select VPN Details. 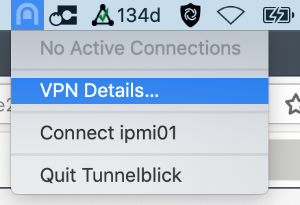
|
In the configuration window of Tunnelblick, drag/drop to the previously downloaded and renamed user-locked profile file (for example ipmi03.ovpn), then authenticate and click 'OK' |
Click on the Tunnelblick icon in the Menu Bar and choose "Connect to $hostname" where $hostname is the name of the OpenVPN server you originally downloaded the software from (i.e. ipmi03.ucar.edu). You can also usually double click the download .ovpn file to load it in TunnelBlick. |
Wait for the notification "System Extension Blocked." On the System Extension Blocked notification, click 'Open Security Preferences', and click on 'Allow' for System software from developer "Jonathan Bullard" was blocked from loading. 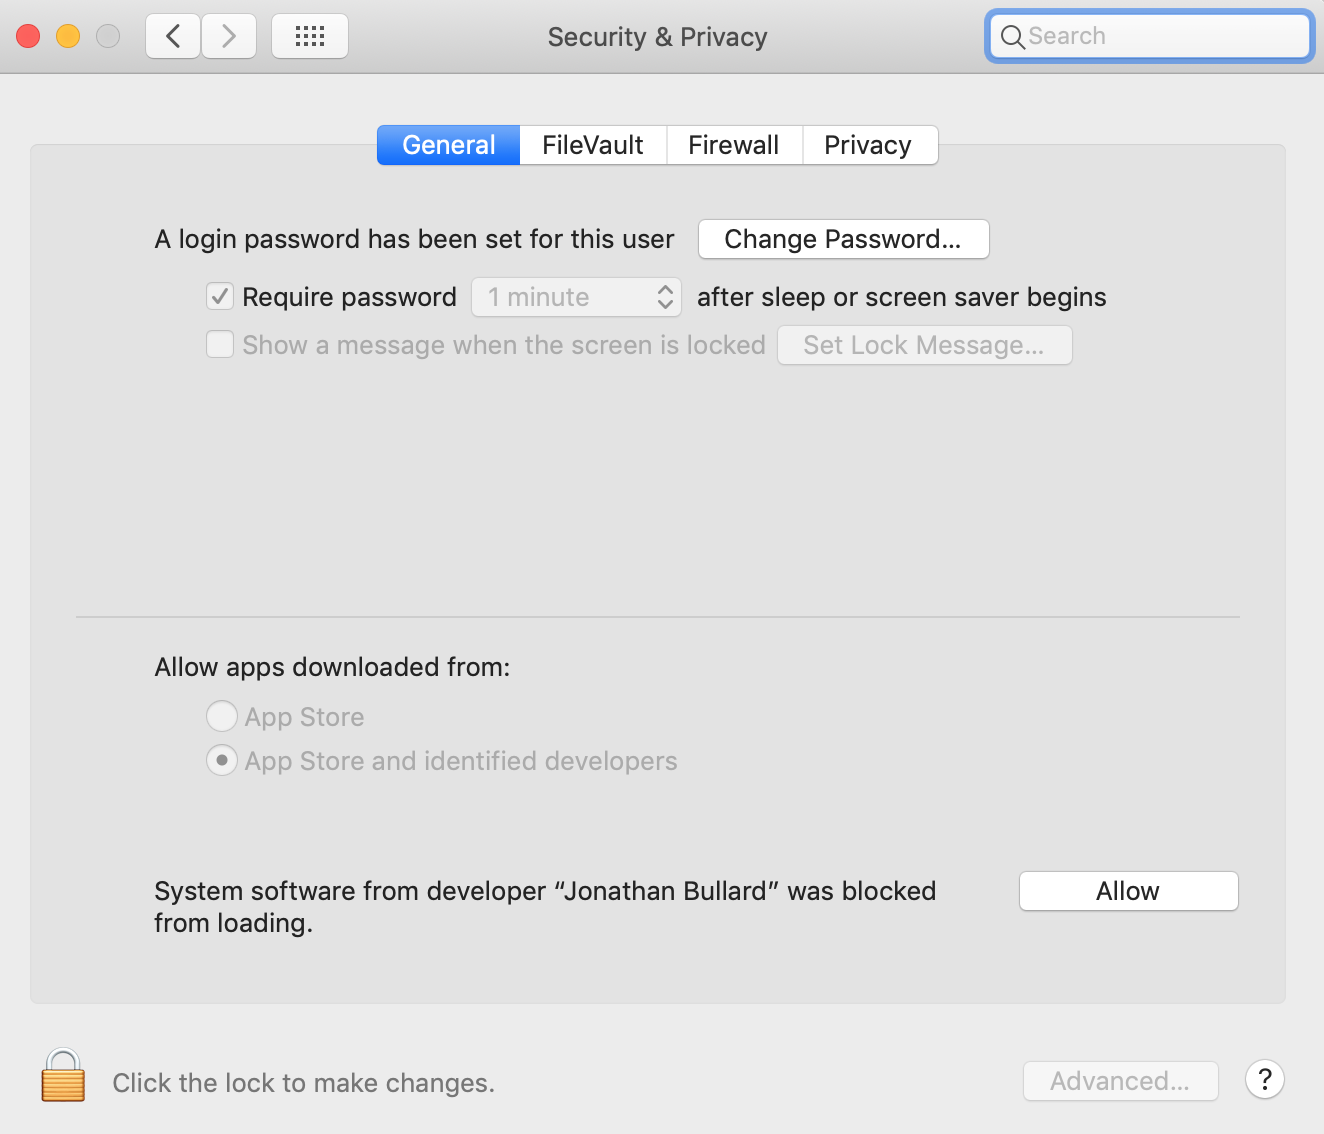
|
Click 'OK' through the notification. |
Click on the Tunnelblick icon in the Finder bar and choose "Connect to $hostname" |
A login window will appear. Authenticate with your UCAR username and two-factor authentication method. |
It may complain of an untrusted certificate due to a hostname mismatch. If you expand the details you should see the assigned UCAR hostname and can safely proceed. You will then be asked if you want to allow the VPN connection. Select Yes. |
After ~6 seconds you get a pop up window saying you are connected. You are now able to reach your IPMI or private networked devices. |
|
Add Additional VPN Connections
To add additional VPN connections, browse to the server and download and rename the .ovpn configuration file. |
Click on the Tunnelblick icon in the Menu Bar > VPN Details. |
Drag/drop the additional .ovpn files and authenticate to allow the connection. |
After adding additional connections you will now see multiple connection options when clicking on the Tunnelblick icon in the Menu Bar. |
|
Windows
Note: IPv6 can cause routing issues once OpenVPN is connected. If IPv6 is not already disabled, you may need to disable it on your network interface before using OpenVPN. Follow these instructions to disable IPv6.
Installing the Windows OpenVPN Application- You will need administrative privileges to install the OpenVPN application. You will also need administrative privileges to add a standard user to the "OpenVPN Administrators" group (see instructions in Step 3).
- Download the OpenVPN application
- Install the software using the default options.
- Launch the OpenVPN application. Either search for "OpenVPN GUI" or navigate to Start Menu > OpenVPN > OpenVPN GUI
- A warning dialogue will indicate that you have no readable connection profiles. Click "Ok" to proceed. Connection profiles will be configured in Step 2.
|
Configuring the ConnectionYou should see: 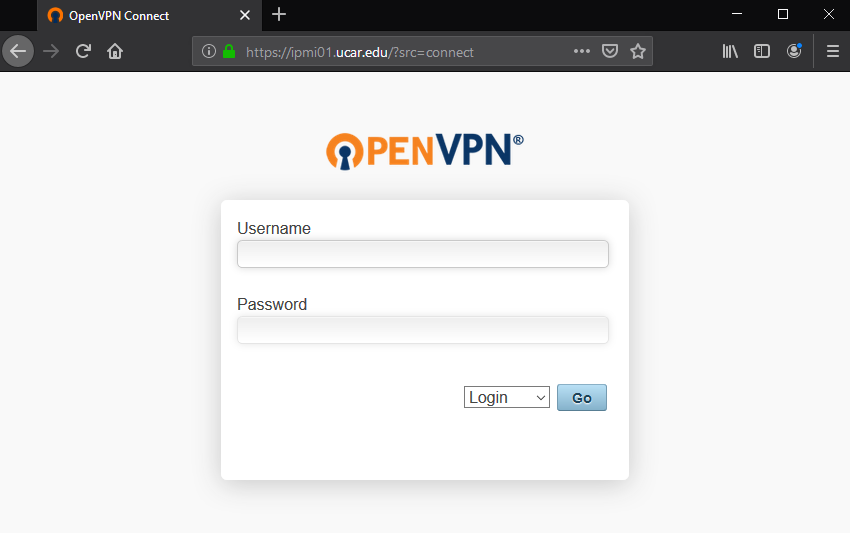
- Log in using your UCAR username and 2-factor authentication method.
- You'll be presented a screen where you can download the OpenVPN client, or a configuration file.

- At the next screen click the "Yourself (user-locked profile)" link and save the client.ovpn file
- Rename the saved file to match the name of the server you downloaded it from to identify which server you are connecting to in the future. (i.e. If you downloaded from ipmi03.nwsc.ucar.edu, rename the downloaded file from "client.ovpn" to "ipmi03.ovpn".)
- Copy the renamed file to the OpenVPN config folder. This folder is located at "C:\Users\%USERPROFILE%\OpenVPN\config" (%USERPROFILE% should be replaced by your username)
- Note: If you did not launch the OpenVPN application in Step 1 you will need to do so now. Launching the application creates the OpenVPN folder used in the step above.
- The OpenVPN application will be running in your System Tray.
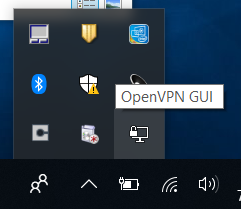
|
Connecting- Right-click the OpenVPN icon in the System Tray and select "Connect".
- Windows 10 requires that the OpenVPN application is run as an administrator or that you are a member of the "OpenVPN Administrators" group to run correctly.
- The first time you connect you will be prompted to add the user to the "OpenVPN Administrators" group. You will need administrative privileges to add the user to this group.
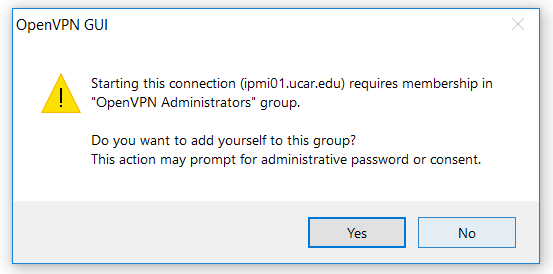
- Select "Yes" and then use an administrative account to add the user to the group. (After the user has been added to the group future connections will not require administrative privileges.)
- Alternatively, you can use Run As to run the application as an administrator.
- Enter your UCAR username and 2-factor authentication method when prompted by OpenVPN.
- After several seconds you should connect. The OpenVPN window will automatically minimize once you have successfully connected.
- You can confirm that you have successfully connected by hovering over the OpenVPN icon in the System Tray.
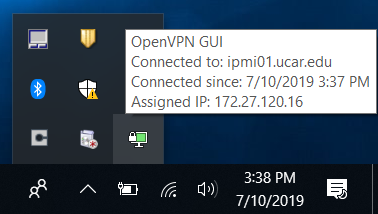
- You are now able to reach your IPMI, iDrac, or private networked devices.
|
|
Add Additional VPN Connections
To add additional VPN connections, repeat the instructions in Step 2 above. |
After adding additional connections you will be prompted to select your connection when right-clicking on the OpenVPN icon in the System Tray. |
|
Connecting via GlobalProtect VPN
It has been discovered that the GlobalProtect client prevents tunneling back through it when trying to use the OpenVPN client to reach our private networks. What this means is if you connect from outside the organization via GlobalProtect, and then start an OpenVPN session, you will not be able to reach your private network devices. One thing to note is that the OpenVPN boxes are on an external network. Therefore you don't need to reach them through the GlobalProtect VPN client. You will be able to reach the systems outside the NCAR networks by browsing to their web addresses.