Users run VisIt on the Cheyenne system in a remote client-server session; that is, with the graphical interface and viewer on a local workstation while running simulations on Cheyenne. To do that, you need to start the VisIt client and create a host profile as described below.
The following documentation assumes that you have already downloaded and installed VisIt locally. You will need to match your local VisIt version to the system version documented below to use these instructions.
VisIt 2.13.3 host profile
This host profile works with version 2.13.3 in the Cheyenne environment. As part of the host profile, you can create launch profiles for using VisIt in these queues:
- “share” queue jobs with low core counts and shared resources
- “economy" queue jobs with high core counts and exclusive resources
Start your VisIt client.
Select Options, then Host profiles…

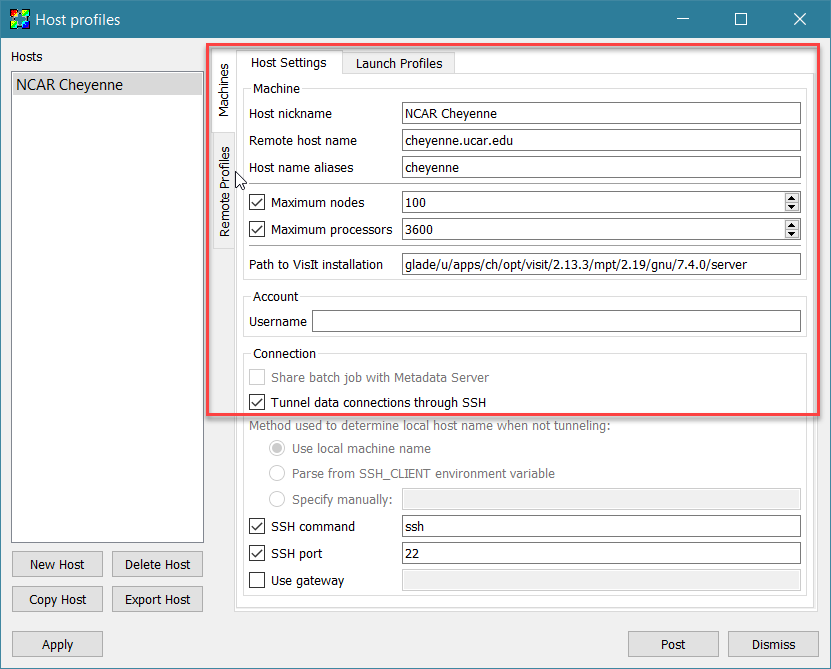
Create an “NCAR Cheyenne” host profile with the Host Settings as shown below, entering your own username where indicated.
You can copy and paste this text for the path to VisIt installation:
/glade/u/apps/ch/opt/visit/2.13.3/mpt/2.19/gnu/7.4.0/server
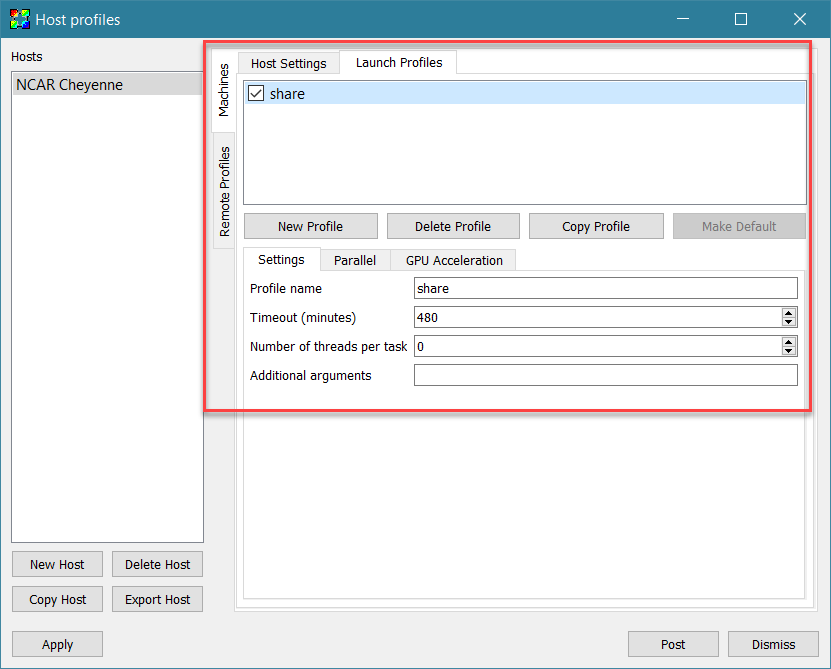
Select the Launch Profiles tab.
Follow the steps below to create a launch profile for each queue that you will use to run VisIt jobs. For example, create one called “share” to use Cheyenne non-exclusive nodes via the “share” queue.
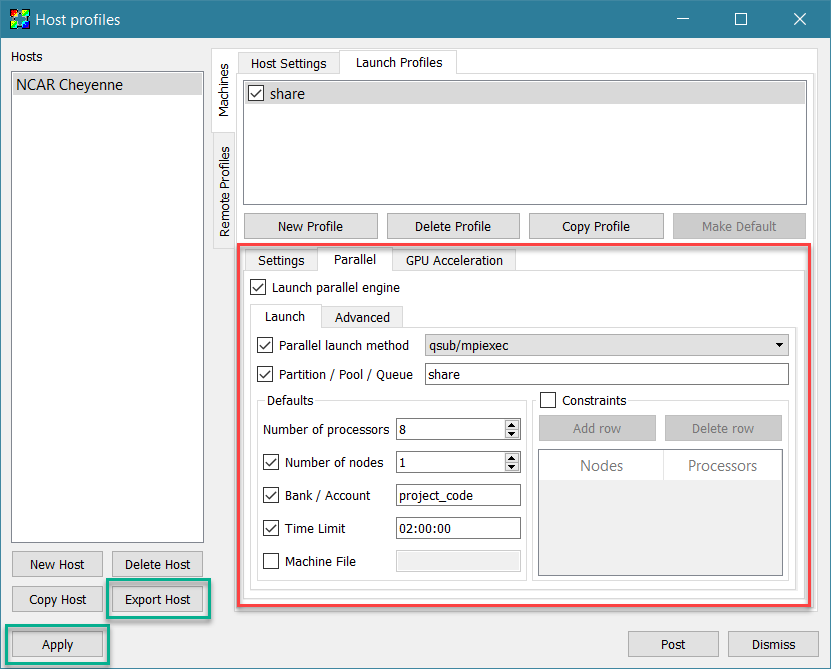
Select the Parallel tab and make the following adjustments:
- Check "Launch parallel engine."
- Check "Parallel launch method" and select the qsub/mpiexec option from the drop-down menu.
- Check "Partition / Pool / Queue" and enter the name of the queue.
- Specify the number of processors you want to use (up to 18 for the share queue and up to 36 for the economy queue).
- Check "Number of nodes" and specify a default. (This must be 1 for the share queue.)
- Check "Bank / Account" and enter your project code.
- Check "Time Limit" and specify a default in PBS format (HH:MM:SS).
Select the name of the host that you want to export — “NCAR Cheyenne,” for example.
Click Export Host.
At that point, you can use the host profile and access the GLADE file spaces to open a file in VisIt.